docker Clash代理
Docker 部署clash 代理翻墙
- 准备一个
docker-compose文件
$ cat docker-compose.yml
version: '3'
services:
  clash:
    container_name: clash_proxy
    image: centralx/clash:1.18.0
    restart: always
    ports:
      - "7890:7890"
      - "8090:80"
    volumes:
      - ./config/clash/config.yaml:/home/runner/.config/clash/config.yaml
-
获取clash config文件
-
Mac 和 Windows 获取方式是一致的
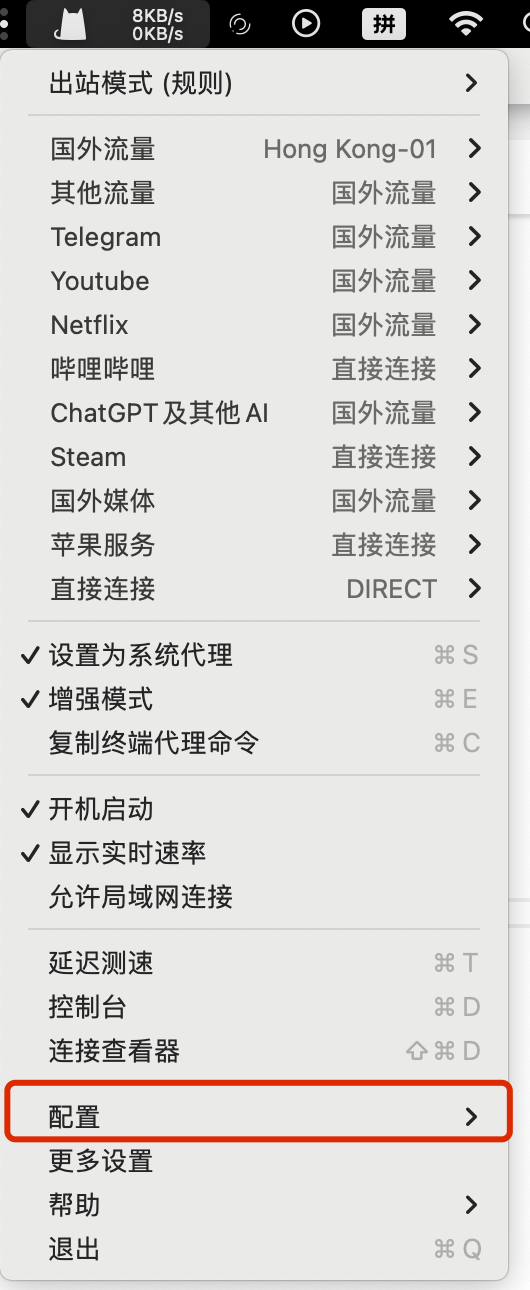
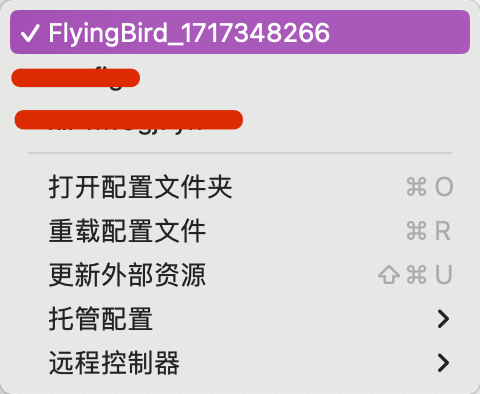
Clash -- 配置 -- 文件(每个人的配置文件都是不一样的。我的文件是以下截图所示)


- 将配置文件中的内容拷贝到一个文件中,并命名为config.yaml
cat config.yaml
port: 7890
socks-port: 7891
allow-lan: true
mode: rule
log-level: info
ipv6: true
external-controller: :9090
secret: xxxxxxxxxxxxxxxxxx  //需要注意这一段的内容为密钥。容器起来需要输入
profile:
  store-selected: true
.......
-
docker-compose 启动容器
[cpu] root@node5:/home/lixie/Docker-proxy-clash# tree . ├── config │ └── clash │ └── config.yaml ├── docker-compose.yml └── run.sh 2 directories, 3 files $ docker-compose up -d -
浏览器测试访问:{IP-address:8090},输入secret中密钥。

看到以上的内容,我们的内容代理节点就搞定了。
测试
5.1 docker 配置代理拉镜像测试。
[cpu] root@node5:/home/lixie/Docker-proxy-clash# cat /etc/docker/daemon.json
{
    "proxies": {
        "http-proxy": "http://10.0.10.158:7890",
        "https-proxy": "http://10.0.10.158:7890",
        "no-proxy": "*.test.example.com,.example.org,127.0.0.0/8"
    },
    "default-ulimits": {
        "memlock": {
            "Hard": 4294967296,
            "Name": "memlock",
            "Soft": 4294967296
        },
        "nofile": {
            "Hard": 1048576,
            "Name": "nofile",
            "Soft": 1048576
        }
    },
    "exec-opts": [
        "native.cgroupdriver=systemd"
    ],
    "insecure-registries": [],
    "log-driver": "json-file",
    "log-opts": {
        "max-file": "3",
        "max-size": "50m"
    },
    "registry-mirrors": []
}
5.2 linux 配置代理 可以在 ~/.bash_profile 定义 proxy_on 和 proxy_off 函数,用于快速开启和关闭代理:
function proxy_off() {
unset no_proxy
unset http_proxy
unset https_proxy
unset all_proxy
echo -e "Proxy Disabled"
}

function proxy_on() {
    # CIDR 网段表示法只在部份受支持的程序里起效
    # 如果不起效,那么需要直接设置具体的 IP 地址
    export no_proxy=localhost,127.0.0.1,127.0.0.0/8,10.0.0.0/8,172.16.0.0/12,192.168.0.0/16
    export http_proxy=http://<host>:7890
    export https_proxy=http://<host>:7890
    export all_proxy=socks://<host>:7890
    echo -e "Proxy Enabled"
}
文献参考
- https://hub.docker.com/r/centralx/clash